


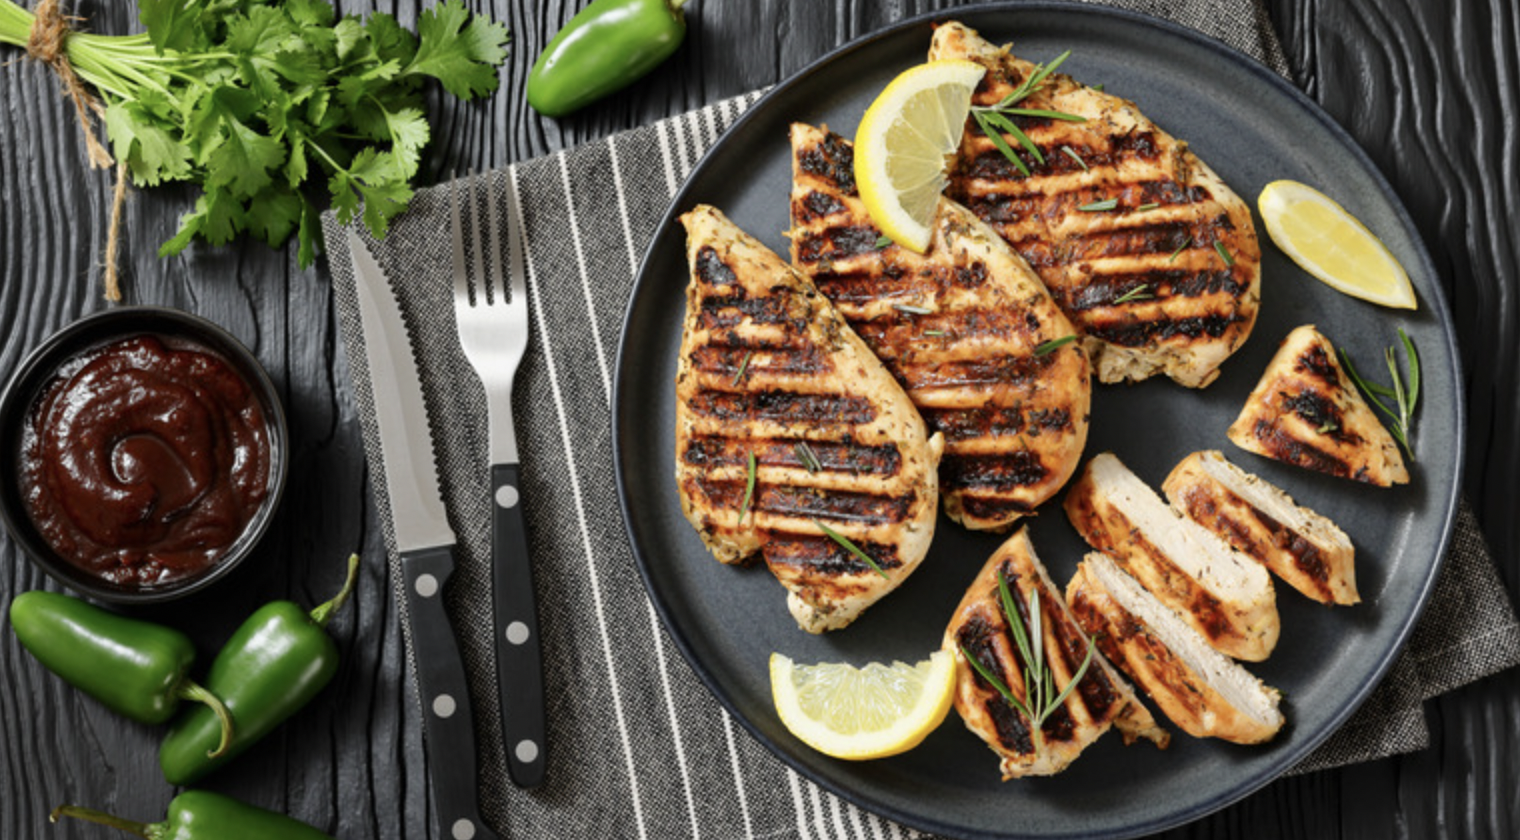
Few kitchen disappointments feel as common as cutting into a piece of chicken only to find it dry, stringy, and considerably less appealing than what you’d imagined while it was cooking. Chicken, particularly the lean breast meat so many households rely on, sits in a frustrating position where a matter of just a few minutes separates perfectly juicy from disappointingly overcooked. Understanding the actual science behind why this happens, and the specific techniques that address it, transforms chicken from a source of recurring frustration into one of the more reliable proteins in your regular cooking rotation.
Why Chicken Dries Out So Easily
Chicken breast in particular contains relatively little fat compared to darker cuts like thighs, and fat plays a meaningful role in keeping meat feeling moist and tender during cooking, since it melts and bastes the surrounding muscle fibers as the meat heats. Without much fat to provide this natural basting effect, chicken breast relies almost entirely on retained moisture within the muscle fibers themselves, and once that moisture cooks out past a certain point, no amount of sauce or seasoning fully compensates for the underlying textural problem.
The muscle proteins in chicken also contract and tighten as they cook, squeezing out moisture progressively the longer and hotter the cooking process continues. This is precisely why the difference between properly cooked and overcooked chicken often comes down to a surprisingly narrow window, sometimes just a couple of minutes past the ideal point, making precision considerably more important with chicken than with more forgiving cuts of meat that contain more fat to buffer against slight overcooking.
Brining: The Single Most Effective Technique
Brining involves soaking chicken in a saltwater solution before cooking, and it remains among the most reliable methods for guaranteeing juicier results. The salt in a brine actually alters the protein structure within the meat, allowing the muscle fibers to hold onto considerably more moisture during cooking than they would otherwise, while also seasoning the meat throughout rather than only on the exterior surface.
A basic brine typically involves dissolving salt in water, roughly a quarter cup of salt per quart of water serves as a reasonable general guideline, though specific ratios vary depending on how long you plan to brine and personal preference.
Chicken breasts generally benefit from anywhere between thirty minutes and a couple of hours in a brine, while longer soaking times beyond this range can actually begin producing an unpleasantly spongy texture rather than continued improvement. For a quicker alternative sometimes called a dry brine, simply salting the chicken directly and letting it rest, uncovered, in the refrigerator for at least an hour before cooking achieves a somewhat similar effect without requiring a full liquid solution.
Pound Chicken Breasts to an Even Thickness
Chicken breasts naturally taper, being considerably thicker at one end than the other, which creates an inherent cooking challenge since the thinner portion inevitably finishes cooking well before the thicker end reaches the same internal temperature. Placing a breast between two sheets of plastic wrap or inside a resealable bag, then gently pounding it with a meat mallet or the flat side of a heavy pan until it reaches a uniform thickness throughout, solves this problem directly by ensuring every part of the piece cooks at the same rate.
This single adjustment often makes a more noticeable difference than people expect, since it eliminates the common scenario where you’re forced to choose between an undercooked thick end and an already dry, overcooked thin end from the very same piece of meat.
Don’t Skip Resting Time After Cooking
Much like a properly cooked steak, chicken benefits genuinely from a brief resting period after coming off the heat, allowing the juices that have been pushed toward the center during cooking to redistribute more evenly throughout the meat before you cut into it. Cutting immediately after cooking causes much of this moisture to simply spill out onto the cutting board rather than remaining within the meat itself, undermining even an otherwise perfectly executed cooking process.
A resting period of five to ten minutes, loosely covered with foil to retain warmth without trapping steam that could soften a nicely developed exterior, makes a meaningful difference in the final eating experience, and this small extra step costs nothing beyond a few minutes of patience.
Use a Meat Thermometer Rather Than Guessing
Visual cues alone, checking whether juices run clear or cutting into the meat to inspect its color, are notoriously unreliable indicators of doneness and frequently lead to either undercooked or, more commonly, significantly overcooked chicken as people err on the side of caution based on imprecise visual assessment.
An inexpensive instant-read meat thermometer removes this guesswork entirely, allowing you to pull chicken from the heat at precisely the right internal temperature rather than relying on appearance or a general sense of how long it’s probably been cooking.
Chicken breast is generally considered safely cooked once it reaches an internal temperature in the range recommended by food safety guidelines, and pulling it from the heat source slightly before reaching that exact final number, since the temperature continues climbing somewhat during the resting period mentioned above, produces consistently better results than cooking until that exact temperature is already reached while still on the heat.
Consider Cooking Methods That Naturally Protect Moisture
Certain cooking methods inherently make it easier to retain moisture than others. Poaching chicken gently in barely simmering liquid, rather than the more aggressive heat of a hard boil, produces remarkably tender, moist results with relatively little risk of overcooking, since the lower, more controlled temperature provides a wider margin for error.
Braising, cooking chicken slowly in liquid at a lower temperature over an extended period, works particularly well for tougher cuts like thighs, breaking down connective tissue while the surrounding liquid continuously bastes the meat throughout the cooking process.
For higher-heat methods like pan-searing or grilling, where the margin for error narrows considerably, starting with a hot pan and finishing at a somewhat lower temperature, or moving chicken to a cooler part of a grill after achieving initial color, helps prevent the exterior from overcooking before the interior has fully caught up.
Marinate for Flavor, But Understand Its Actual Limits
Marinades add valuable flavor and, when they contain acidic ingredients like citrus juice or vinegar, can provide some tenderizing effect on the surface layers of the meat. However, it’s worth that marinades penetrate only a relatively shallow depth into the meat regardless of how long you marinate, meaning extended marinating time beyond a few hours generally adds more flavor without proportionally more tenderizing benefit, and marinating for excessively long periods with highly acidic ingredients can actually begin breaking down the exterior texture in an undesirable, almost mushy way.
This limitation helps calibrate expectations appropriately, treating marinades primarily as a flavor tool working alongside other genuine moisture-retention techniques like brining and proper temperature control, rather than as a complete solution to dryness on their own.
Choose Bone-In, Skin-On Cuts When Moisture Is Your Top Priority
If juiciness matters more to you than the convenience of boneless, skinless breast meat, bone-in, skin-on chicken pieces offer some inherent advantages. The bone helps insulate the surrounding meat during cooking, slowing the rate of moisture loss somewhat compared to boneless cuts exposed more directly to heat from every angle. The skin, when left intact during cooking, provides an additional protective barrier and bastes the meat beneath it as rendered fat works its way through during the cooking process.
For situations where boneless, skinless breast is specifically required by a recipe or personal preference, applying the other techniques covered here becomes correspondingly more important, since you’re working with a cut that offers less natural protection against drying out compared to bone-in, skin-on alternatives.
Let Chicken Come Closer to Room Temperature Before Cooking
Chicken taken directly from the refrigerator and placed immediately into a hot pan or oven cooks unevenly, since the exterior begins cooking well before the still-cold interior has had any chance to warm up, often resulting in an overcooked exterior by the time the center finally reaches a safe temperature.
Allowing chicken to sit at room temperature for roughly fifteen to twenty minutes before cooking, though not longer given food safety considerations around extended time in the temperature danger zone, helps the meat cook more evenly from edge to center.
This adjustment works particularly well in combination with the pounding technique mentioned earlier, since an evenly thick piece of chicken that’s also closer to a uniform starting temperature throughout gives you the best possible foundation for consistent, even cooking from start to finish.
Building Confidence Through Practice and Attention
Mastering consistently juicy chicken ultimately comes down to combining several of these techniques rather than relying on any single trick in isolation. Brining or dry-salting ahead of time, pounding to an even thickness, cooking with an accurate thermometer rather than guesswork, choosing an appropriate method for your specific cut, and allowing a proper rest afterward all work together, each addressing a different aspect of the moisture-loss problem from a slightly different angle.
Once these habits become automatic rather than requiring conscious effort every single time, chicken transforms from an unpredictable gamble into one of the most dependable proteins you can reach for on a regular basis.
Adjusting Technique for Different Cooking Formats
The specific adjustments that matter most vary somewhat depending on exactly how you’re preparing your chicken. When roasting a whole bird or larger bone-in pieces in the oven, spatchcocking, removing the backbone so the bird lies flat, promotes far more even exposure to heat than the traditional trussed shape, which tends to leave the breast overcooked by the time the thighs finish.
Tenting the breast area loosely with foil partway through a longer roast, once it has developed sufficient color, protects it from continuing to dry out while the thighs and legs catch up to a safe internal temperature.
For stovetop searing, resisting the urge to move the chicken around the pan constantly allows a proper crust to form on one side before flipping, and finishing thicker pieces in a moderate oven after searing, rather than trying to cook them entirely on the stovetop, provides gentler, more even heat for the interior while the exterior has already achieved good color and texture.
Grilling introduces its own variable in the form of direct flame intensity, and building a two-zone fire, one section with direct high heat and another cooler section without direct flame beneath it, gives you somewhere to move pieces that are browning too quickly relative to how done they actually are inside.
Slow cookers and pressure cookers handle chicken rather differently than dry-heat methods, since the moist, enclosed cooking environment makes genuine dryness far less likely, though overcooking chicken breast specifically in a slow cooker for too many hours can still produce a stringy, shredded texture that some people find less appealing than a more intact piece, even though the meat technically retains plenty of moisture within that shredded structure.
Conclusion
Even when following most of the advice above, a few habits can still quietly sabotage results. Overcrowding a pan is a particularly common culprit, since too many pieces packed too closely together trap steam and lower the pan’s overall temperature, preventing the proper browning that a hot, uncrowded surface would otherwise achieve, and often extending cooking time well beyond what’s actually needed, which increases the risk of drying out the interior while waiting for browning that’s being hindered by overcrowding in the first place.
Flipping too frequently is another subtle issue, since constant flipping interrupts the crust formation process and can make it harder to judge visually how a piece is actually progressing. Settling on a reasonable flip schedule, generally just once or twice for a pan-seared piece, produces more predictable, better-textured results than repeatedly checking and turning the meat out of impatience or uncertainty.
Cooking chicken cold, straight from a refrigerator that’s colder than typical due to it being placed near the back or bottom of the appliance, exaggerates the uneven cooking problem discussed earlier, making the room-temperature resting step even more valuable for pieces that have been stored at a particularly cold spot within your specific refrigerator.
Frequently Asked Questions
Does brining make chicken taste noticeably saltier than usual?
When done with an appropriate ratio and reasonable soaking time, brined chicken shouldn’t taste distinctly saltier than normally seasoned chicken, since much of the salt is used to alter protein structure and retain moisture rather than simply adding overwhelming seasoning. If you find brined chicken consistently too salty, reducing either the salt concentration in your brine or shortening the soaking duration usually resolves this without sacrificing the underlying moisture-retention benefit.
Is it safe to eat chicken that’s slightly pink near the bone even if the temperature reads as done?
Yes, this is a common and harmless phenomenon, particularly in younger poultry, caused by bone marrow pigment seeping into the surrounding meat rather than any indication of undercooking. As long as an accurate thermometer confirms the meat has reached a safe internal temperature, slight pinkness near the bone doesn’t indicate a food safety problem, even though it can understandably look concerning if you’re relying on color alone rather than an actual temperature reading.
Why does chicken sometimes turn out rubbery rather than dry?
A rubbery texture, distinct from dryness, often results from cooking at too low a temperature for too long, particularly in methods like poaching or sous vide where the technique itself is gentle but an excessively extended cooking time can still toughen the proteins even while technically retaining moisture. Reducing overall cooking time slightly, or increasing the temperature modestly while shortening duration correspondingly, often resolves a persistent rubbery texture issue.
Can frozen chicken be brined, or does it need to be fully thawed first?
Chicken should generally be fully thawed before brining, since a still-frozen or partially frozen piece won’t absorb the brine solution evenly, meaning some portions receive the intended moisture and seasoning benefit while others remain essentially untreated. Thawing chicken safely in the refrigerator, then proceeding with brining once it’s fully thawed, produces far more consistent results than attempting to combine the two processes simultaneously.
How do I know if pounding chicken breast has made it too thin?
A reasonable target thickness for pounded chicken breast falls somewhere around half an inch, thin enough to cook quickly and evenly but not so thin that it becomes difficult to handle or dries out almost instantly given the reduced mass. If pieces become noticeably thinner than this, cooking time shortens dramatically, and keeping a closer eye on the process, along with using a thermometer, helps avoid overshooting an already narrow cooking window on especially thin pieces.
Does resting chicken under foil make the crust soggy?
Tenting loosely, rather than wrapping tightly, allows enough air circulation to prevent significant sogginess while still retaining enough warmth to be worthwhile. If crispness is an especially high priority, resting the chicken on a wire rack rather than directly on a plate, with foil tented loosely above rather than in direct contact, further reduces the trapped steam that contributes to a softened exterior during the resting period.
